Quick Answer: A miter saw is a stationary power tool that brings a spinning circular blade
down onto a workpiece to make fast, precise crosscuts, miter cuts (angled cuts across the face
of the board), bevel cuts (angled cuts through the thickness), and compound cuts. It is the
go-to tool for trim carpentry, crown molding, framing, and any project requiring perfectly
repeatable angle cuts.
Whether you’re framing a room, installing crown molding, building a deck, or cutting picture frames, one tool shows up again and again in the professional woodworker’s shop: the miter saw. It’s precise, fast, safe to learn, and versatile enough to handle dozens of project types — which is exactly why it’s the first power tool most carpenters buy.
But if you’ve ever stood in a hardware store staring at a wall of compound sliding dual-bevel saws
and wondered “what does any of that actually mean?” — this guide is for you.
I’m going to cover everything: what a miter saw is, how it works, and every type of miter saw
explained in plain English, all the cuts it can make, what projects it excels at, and how to use one
safely step by step, and how to choose the right one for your needs.
Let’s start from the beginning.
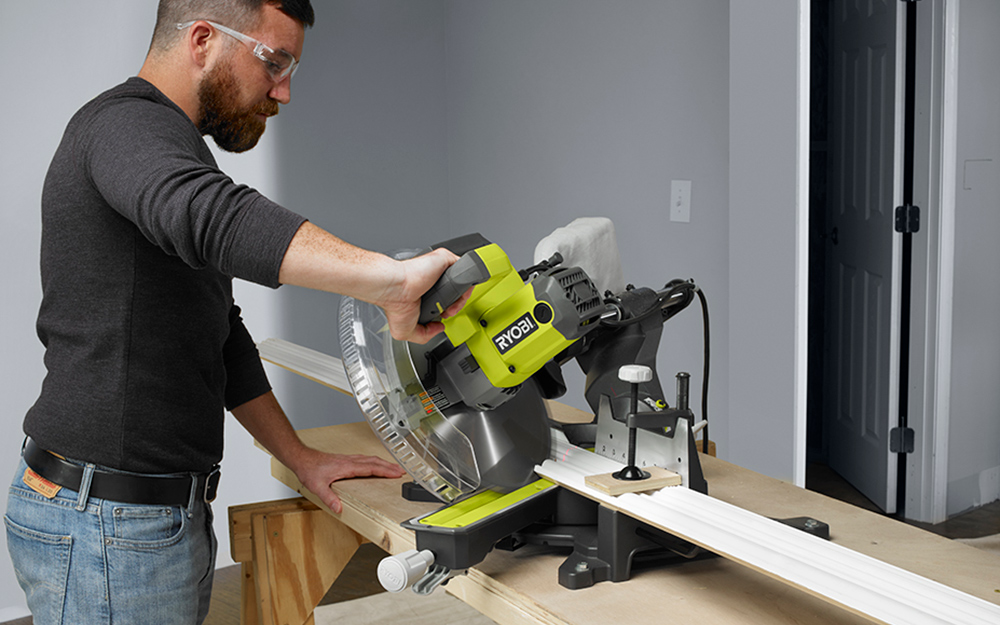
Credit: www.homedepot.com
What Is a Miter Saw?
A miter saw is a stationary power tool designed to make accurate, repeatable crosscuts and angle
cuts in wood and other materials. It works by pulling a motorized, spinning circular blade
downward onto a workpiece that is held against a stationary back fence — giving the operator
precise control over both the cut angle and the cut depth.
Unlike a table saw, where you push the material through a stationary blade, a miter saw keeps the
material still and brings the blade down to the work. This fundamental difference is what makes
the miter saw so safe and accurate for angle work.
The power miter saw was invented by Ed Niehaus, Chief Engineer of Rockwell International’s
Power Tool Division, in 1964. Rockwell chose not to patent the design, which led to an explosion
of manufacturers and rapid improvements — and ultimately gave us the modern miter saw we
know today.
You’ll also hear miter saws called:
- Drop saw — because the blade drops down onto the wood
- Chop saw (technically incorrect — a true chop saw cuts only at 90° and is designed for metal)
- Cut-off saw
- Mitre saw (British English spelling)
How Does a Miter Saw Work?
The operating principle of a miter saw is beautifully simple.
A circular saw blade is mounted on a hinged arm above a flat cutting table. The blade spins at high speed (typically 3,200 – 5,000 RPM). When you press the trigger and push the handle down, the blade drops through the workpiece, which is held flat on the table and pressed firmly against the vertical back fence.
The magic is in the adjustability:
- Rotate the table left or right to change the miter angle — the angle of the cut across the face of the board
- Tilt the blade head left or right (on compound models) to change the bevel angle — the angle of the cut through the thickness of the board
- Slide the blade forward and back (on sliding models) to increase the cutting width
This combination of adjustments gives you the ability to produce virtually any cut angle required in woodworking in seconds, with no setup jig required.
Anatomy of a Miter Saw: Every Part Explained
Understanding the parts of your miter saw makes you a safer, more confident operator. Here are all the key components:
1. Blade
The circular cutting disc. Most miter saws use carbide-tipped blades. The tooth count affects cut quality: more teeth (60–80T) = smoother finish cuts; fewer teeth (24–40T) = faster rip cuts. Blade sizes range from 7¼” to 12″, with 10″ and 12″ being most common.
2. Blade Guard
A transparent or opaque safety cover that automatically retracts when you lower the blade and retracts when you raise the arm. Never remove or disable your blade guard.
3. Fence
The vertical back wall against which you hold your workpiece. It ensures the board is held at a consistent, precise angle relative to the blade. Some models have a dual-piece fence that slides apart for bevel cuts.
4. Table / Base
The flat horizontal surface where your workpiece rests. Rotates left and right to set miter angles.
5. Miter Gauge / Miter Index
The angle scale on the front of the base shows your current miter angle. Most saws have positive stops (detents) at common angles: 0°, 15°, 22.5°, 30°, and 45°.
6. Miter Lock Handle
A lever or knob that locks the table at your chosen miter angle. Always tighten this before making a cut.
7. Bevel Adjustment
On compound miter saws, this control tilts the blade head left (and sometimes right) to create bevel angles. Usually has a scale and positive stops at 0°, 33.9°, and 45°.
8. Bevel Lock
Locks the blade head at your chosen bevel angle. Must be tightened before cutting.
9. Arm / Pivot
The hinged arm that carries the motor and blade assembly. Springs upward when released.
10. Motor
An electric motor that drives the blade. Measured in amps (most are 12–15 amps). Higher amperage = more power to cut dense hardwoods.
11. Handle & Trigger
The grip you hold while operating the saw. The trigger (and often a safety release button) controls blade rotation.
12. Safety Release
A secondary safety mechanism you must hold or press while squeezing the trigger. Prevents accidental blade activation.
13. Sliding Rails
Present on sliding miter saws. Allow the motor/blade assembly to travel forward and back, significantly increasing cutting width.
14. Hold-Down Clamp
An optional (sometimes built-in) clamp that secures the workpiece to the table for added safety and precision.
15. Dust Port
A rear-facing port that can be connected to a shop vacuum or dust bag to collect sawdust during operation.
16. Laser Guide / LED Shadow Line
Found on many modern saws. Projects a line onto the workpiece showing exactly where the blade will cut. Enormously helpful for accurate alignment without marking the wood.
17. Extension Wings
Fold-out support tables on either side of the main table, helping to support longer workpieces.
Types of Miter Saws
This is where most beginners get confused. Let me break down every type of miter saw clearly.
1. Standard (Basic) Miter Saw
The simplest and most affordable option. A standard miter saw rotates left and right on the base to make miter cuts, but the blade head does not tilt — meaning it cannot make bevel cuts.
Best for:
- Straight crosscuts at 90°
- Simple 45° miter cuts for picture frames
- Cutting framing lumber and dimensional lumber
- Beginners who need a basic, easy-to-use saw
Limitations: Cannot make bevel cuts, limiting its usefulness for crown molding and trim work.
2. Compound Miter Saw (Single Bevel)
A compound miter saw does everything a standard miter saw does, plus the blade head tilts — but only in one direction (usually left). This allows you to make compound cuts: cuts that are angled both across the face AND through the thickness of the board simultaneously.
Best for:
- Crown molding and baseboard installation
- Picture frames and decorative trim
- Any project requiring both a miter and a bevel cut at the same time
Limitation: You have to flip the workpiece to cut compound angles in the other direction.
3. Dual Bevel Compound Miter Saw (Double Bevel)
This is the compound miter saw upgraded. The blade tilts in both directions — left and right — meaning you never have to flip your workpiece. This is the most popular choice among professional carpenters and serious DIYers.
Best for:
- High-volume crown molding and trim carpentry
- Any job requiring repeated compound cuts in both directions
- Pros who need efficiency and speed without flipping boards
Advantage over single bevel: Dramatically faster workflow for trim work.
4. Sliding Compound Miter Saw
A sliding miter saw adds horizontal sliding rails to the compound design. These rails allow you to push or pull the blade head forward and back during the cut, significantly increasing the maximum cutting width.
- A 10″ non-sliding miter saw cuts boards up to about 6″ wide
- A 10″ sliding miter saw can cut boards up to 12″–16″ wide
Best for:
- Cutting wide boards and planks
- Decking and wide flooring materials
- Cutting crown molding flat (rather than standing it against the fence)
- Contractors and carpenters who regularly work with wide stock
5. Sliding Dual Bevel Compound Miter Saw
The top-of-the-line option. Combines sliding rails + dual bevel tilting + compound angle capability in one machine. The most versatile miter saw available.
Best for:
- Professional carpenters and finish carpenters
- Any serious woodworking shop
- Users who need maximum cutting capacity and angle flexibility
6. Cordless / Battery-Powered Miter Saw
Any of the above types can come in a cordless (battery-powered) version. Modern 18V or 36V brushless motor models rival corded saws in performance while offering total job-site freedom.
Best for:
- Job site work without reliable power access
- Remote locations and outdoor projects
- Contractors who move frequently between sites
Trade-off: Higher upfront cost; battery life limits run time.
7. Miter Box and Hand Saw (Manual Miter Saw)
The original miter saw — a wooden or plastic three-sided box with 45° and 90° slots to guide a hand saw. No motor, no electricity. Still useful for small trim work and fine woodworking, where power tools are overkill.
Should You Buy A Miter Saw? – Beginner Woodworker’s Guide
Types of Cuts a Miter Saw Makes
Understanding these four cut types is essential for getting the most out of your miter saw.
Crosscut
A straight cut made perpendicular (90°) to the grain of the wood, shortening the length of a board. This is the most common miter saw cut. Set your miter angle to 0° and your bevel to 0°.
Example use: Cutting a 2×4 stud to length for a wall frame.
Miter Cut
An angled cut made across the face (width) of the board — like cutting a corner angle on a picture frame. Achieved by rotating the saw’s base table left or right to your desired angle. Most miter cuts are set at 45° for 90° corner joins.
Example use: Cutting the corners of a picture frame or baseboard corner joint.
Bevel Cut
An angled cut made through the thickness (edge) of the board — not across the face. The cut angle changes the profile of the board’s edge. Achieved by tilting the blade head on compound miter saws.
Example use: Cutting a chamfered edge on a tabletop or creating a sloped fascia board.
Compound Cut
A cut that combines both a miter angle and a bevel angle simultaneously. This is the most complex cut and requires a compound (or sliding compound) miter saw. Compound cuts are essential for crown molding because crown molding sits at a spring angle between the wall and ceiling — requiring both angles to be cut at once.
Example use: Installing crown molding around a ceiling perimeter.
What Is a Miter Saw Used For? 12 Real-World Projects
The miter saw truly earns its place in any shop. Here are the most common uses:
1. Crown Molding Installation: The definitive miter saw task. Crown molding requires precise compound cuts — typically 31.6° bevel and 45° miter — to sit flush against wall-ceiling intersections. A dual bevel saw makes this dramatically easier.
2. Baseboard and Door Casing Trim: Inside and outside corners on baseboards require 45° miter cuts for tight, seamless joints. This is one of the most common finish carpentry tasks.
3. Framing Lumber Cuts: Cutting wall studs, top plates, and bottom plates to precise length. The miter saw’s speed and repeatability make it far faster than a circular saw for this task.
4. Decking and Porch Flooring: Cutting deck boards, porch boards, and composite decking to consistent lengths with clean, square ends.
5. Window and Door Casing: Installing casing around windows and doors requires precise 45° miter cuts at the corners — perfect work for a miter saw.
6. Chair Rail and Wainscoting: Horizontal decorative trim installed at chair height. Miter cuts join the pieces cleanly at corners.
7. Picture Frames: Four 45° miter cuts per frame. A miter saw makes creating perfectly fitting picture frames fast and easy.
8. Furniture Building: Cutting legs, aprons, rails, and stretchers to consistent lengths. The miter saw ensures square, accurate cuts for furniture that assembles without gaps.
9. Shelving and Cabinets: Cutting shelf planks, face frames, and box components to exact dimensions.
10. Stair Handrails and Balusters: Cutting handrail sections and balusters to precise length, often at specific angles to match the stair pitch.
11. Fence Pickets and Outdoor Structures: Quickly cutting fence boards, pergola rafters, and garden structure components to consistent lengths.
12. Flooring Installation: Cutting hardwood flooring, laminate, and engineered wood planks to length during installation.
Miter Saw vs. Other Saws: Which Do You Need?
| Feature | Miter Saw | Circular Saw | Table Saw | Jigsaw |
| Crosscuts | ⭐⭐⭐⭐⭐ Excellent | ⭐⭐⭐ Good | ⭐⭐⭐ Good | ⭐⭐ Fair |
| Angle cuts | ⭐⭐⭐⭐⭐ Excellent | ⭐⭐⭐ Moderate | ⭐⭐⭐ Good | ⭐⭐ Fair |
| Rip cuts | ❌ Not possible | ⭐⭐⭐⭐ Good | ⭐⭐⭐⭐⭐ Excellent | ⭐⭐ Fair |
| Curved cuts | ❌ Not possible | ❌ Not possible | ❌ Not possible | ⭐⭐⭐⭐⭐ Excellent |
| Portability | ⭐⭐⭐ Moderate | ⭐⭐⭐⭐⭐ Excellent | ⭐ Poor | ⭐⭐⭐⭐⭐ Excellent |
| Accuracy | ⭐⭐⭐⭐⭐ Excellent | ⭐⭐⭐ Moderate | ⭐⭐⭐⭐ Very Good | ⭐⭐⭐ Moderate |
| Learning curve | ⭐⭐⭐⭐⭐ Very Easy | ⭐⭐⭐ Moderate | ⭐⭐⭐ Moderate | ⭐⭐⭐ Moderate |
| Trim/molding work | ⭐⭐⭐⭐⭐ Excellent | ⭐⭐ Poor | ⭐⭐ Poor | ❌ Not suitable |
Choose a miter saw when: You need precise, repeatable crosscuts and angle cuts — especially for trim, framing, and finish carpentry.
Choose a table saw when: You need to rip lumber lengthwise, or cut large sheet goods like plywood.
Choose a circular saw when: You need maximum portability or need to cut in place (on a job site where you can’t bring lumber to the saw).
Choose a jigsaw when: You need curved, irregular, or freehand cuts.
How to Use a Miter Saw: Step-by-Step Guide
Follow these steps every time for safe, accurate results.
Step 1: Set Up Your Work Area
Place your miter saw on a stable, level surface — a dedicated miter saw stand or a sturdy workbench. Make sure there’s adequate support on both sides of the saw for long boards. Plug in (or charge) your saw and ensure it’s locked in the down position before starting.
Step 2: Put on Your Safety Gear
Before touching anything else:
- Safety glasses or goggles
- Hearing protection (earmuffs or earplugs)
- Dust mask or respirator
Tie back loose hair. Remove dangling jewelry. Tuck in loose clothing.
Step 3: Measure and Mark Your Cut Line
Use a tape measure to mark the cut length on your workpiece. Use a pencil to draw a clear, visible line across the board. For accuracy, a speed square or combination square will give you a perfectly perpendicular line.
Step 4: Set Your Miter Angle
If making a straight 90° cut: confirm the miter gauge is at 0°. If making a miter cut: loosen the miter lock handle, rotate the table to your desired angle (e.g., 45°), and tighten the lock handle firmly.
Step 5: Set Your Bevel Angle (If Needed)
If making a straight or miter cut only: confirm the bevel is at 0°. If making a bevel or compound cut: loosen the bevel lock, tilt the blade head to your desired angle, and lock it in place.
Step 6: Position Your Workpiece
Place the board flat on the table with the face side up. Press it firmly against the back fence. Line up your blade with the waste side of your cut line — meaning the blade will cut just outside the line, toward the scrap end. This ensures your finished piece is the exact length you need.
Step 7: Use the Hold-Down Clamp (Optional but Recommended)
For added stability, especially on smaller pieces, engage the built-in clamp or use an auxiliary clamp to secure the workpiece to the table.
Step 8: Check Your Blade Path
Before starting the motor, lower the blade slowly (with the saw off) to visually confirm the blade aligns with your cut line on the waste side. Raise the blade back up.
Step 9: Start the Blade
Hold the handle firmly. Press and hold the safety release, then squeeze the trigger. Allow the blade to come to full speed before lowering it into the wood. This is important — never start the blade while it’s already in contact with the workpiece.
Step 10: Make the Cut
Slowly and smoothly lower the spinning blade into the wood. Let the saw do the work — don’t force it or push it down quickly. A smooth, controlled descent produces the cleanest cut with the least tearout.
Step 11: Release and Wait
Once the cut is complete, release the trigger and hold the blade in the lowered position until it comes to a complete stop. Then raise the blade. This prevents the spinning blade from snagging the cut material as it’s lifted.
Step 12: Remove Your Workpiece
With the blade fully raised and stopped, remove the workpiece and scrap piece. Check your cut for accuracy.
Miter Saw Safety Rules Every Woodworker Must Know
The miter saw is considered one of the safer power saws because of its stationary nature and controlled cutting motion — but it is still a powerful tool that demands respect.
Always Do:
- ✅ Wear safety glasses, hearing protection, and a dust mask on every cut
- ✅ Keep your hands at least 6 inches away from the blade path at all times
- ✅ Let the blade reach full speed before lowering it into the wood
- ✅ Let the blade come to a complete stop before raising it or moving the workpiece
- ✅ Keep your workpiece firmly pressed against the fence before cutting
- ✅ Use the hold-down clamp for small or narrow pieces
- ✅ Unplug (or remove the battery) when changing the blade or making adjustments
- ✅ Inspect your workpiece for nails, screws, or knots before cutting
Never Do:
- ❌ Never start the saw with the blade already touching the wood
- ❌ Never reach under the blade while it is spinning
- ❌ Never make freehand cuts without the workpiece against the fence
- ❌ Never cut pieces shorter than 8 inches without a clamp
- ❌ Never wear loose gloves while operating (they can catch in the blade)
- ❌ Never leave the saw unattended while plugged in
- ❌ Never disable or remove the blade guard
How to Choose the Right Miter Saw for Your Needs
Here’s how to narrow down the right saw for your situation.
1. What Type of Work Will You Do?
| If you mainly do… | Choose this type |
| Basic framing and crosscuts | Standard miter saw |
| Trim, molding, baseboard | Single or dual bevel compound |
| Crown molding professionally | Dual bevel compound |
| Wide boards, decking, large lumber | Sliding compound |
| Variety of professional tasks | Sliding dual bevel compound |
| Job site work without power | Cordless compound |
2. Blade Size: 10″ or 12″?
10-inch miter saw:
- Lighter and more portable
- Less expensive
- Plenty of cutting capacity for most homeowners and DIYers
- Cuts boards up to about 6″ wide (non-sliding) or 12″ (sliding)
12-inch miter saw:
- More cutting capacity — wider and deeper cuts
- Better for 4×4 and larger lumber
- Heavier and more expensive
- Preferred by professional contractors
Recommendation for most users: A 10-inch sliding compound miter saw gives you the best balance of capacity, portability, and price.
3. Motor Power (Amps)
- 10 amps: Fine for light softwood cutting
- 12 amps: Good all-around performance
- 15 amps: Best for hardwoods, thick stock, and heavy-duty use
4. Single Bevel vs. Dual Bevel
If you’re doing any trim or crown molding work, spend the extra money for dual bevel. The time saved not flipping boards pays for itself quickly.
5. Corded vs. Cordless
For a workshop: corded is fine and more economical. For job-site work: cordless is worth the premium. If you already own a battery platform (Dewalt, Milwaukee, Makita, etc.), check compatibility before buying.
6. Key Features to Look For
- Laser guide or LED shadow line: Dramatically improves cut accuracy
- Positive stops (detents): Pre-set angle stops at common angles (15°, 22.5°, 30°, 45°)
- Tall fence: Better support for wide crown molding and thick stock
- Dust collection port: Keeps your shop clean; compatible with standard vacuum hose
- Electric brake: Stops the blade within 1-2 seconds of releasing the trigger (a major safety feature)
- Soft start: Reduces blade startup jerk for smoother, more controlled operation
Miter Saw Blade Sizes Explained {#blade-sizes}
| Blade Size | Max Crosscut Width | Max Crosscut Depth | Best For |
| 7¼ inch | 4–5″ | 2–2.5″ | Light trim work, small molding |
| 10 inch | 6–8″ (12″+ sliding) | 3–3.5″ | Most DIY and professional work |
| 12 inch | 8–10″ (16″+ sliding) | 3.5–4.5″ | Heavy framing, wide boards, 4×4 posts |
Blade tooth count matters too:
- 24–40 teeth: Fast cuts, rougher finish — good for framing
- 60–80 teeth: Slower cuts, glass-smooth finish — ideal for trim, molding, finish carpentry
Miter Saw Maintenance Tips
A well-maintained miter saw lasts decades. Here’s how to keep yours in peak condition.
After Every Use:
- Blow out sawdust from the blade guard, pivot points, and vents with compressed air
- Empty or disconnect the dust bag
- Wipe down the table and fence with a dry cloth
- Return the blade to the locked-down position
Monthly:
- Inspect the blade for chipped, missing, or dull teeth — replace if needed
- Check that the fence is square to the blade (use a machinist’s square)
- Verify the miter and bevel angles are accurate at 0° using a square
- Lubricate the sliding rails (on sliding models) with a dry PTFE lubricant or paste wax
- Inspect the power cord or battery connection for damage
Blade Care:
- Clean pitch, sap, and resin buildup from the blade using a blade cleaning spray or household oven cleaner
- Never use a dull blade — it causes burning, tearout, and dangerous kickback forces
- Store spare blades in protective covers
Squaring Your Miter Saw (Critical for Accuracy):
- Set miter to 0° and bevel to 0°
- Hold a reliable machinist’s square against the fence and check that the blade is perfectly perpendicular
- If not, use the manufacturer’s adjustment screws (documented in your owner’s manual) to correct it
- Check again at 45° — a well-calibrated saw should be accurate at both positions
Common Miter Saw Mistakes (and How to Fix Them)
Mistake 1: Cutting on the Wrong Side of the Line
Problem: Your finished piece is ⅛” too short. Fix: Always cut on the waste side of the line — meaning the blade removes wood from the scrap, not the finished piece. The blade itself has thickness (the “kerf” — about ⅛”) that must be accounted for.
Mistake 2: Not Letting the Blade Reach Full Speed
Problem: Rough, torn cuts; burning. Fix: Always wait 1–2 seconds after pressing the trigger for the blade to reach full RPM before lowering it into the wood.
Mistake 3: Lifting the Blade Too Early
Problem: Splintered surface, blade catches the cut piece. Fix: Release the trigger and hold the blade in the down position until it completely stops before raising it.
Mistake 4: Not Pressing the Workpiece Firmly Against the Fence
Problem: Inaccurate angles, the board shifts mid-cut. Fix: Always maintain consistent pressure against the fence throughout the entire cut. Use a clamp if needed.
Mistake 5: Ignoring the Kerf in Calculations
Problem: Multiple repeated cuts come out slightly short. Fix: The blade has a kerf (width) of about ⅛”. When cutting multiple identical pieces, use a stop block and account for the kerf in your measurements.
Mistake 6: Using a Dull Blade
Problem: Burning, rough cuts, excessive force needed. Fix: Replace or sharpen blades regularly. A sharp blade produces noticeably cleaner results with less effort.
Mistake 7: Skipping the Squaring Step
Problem: All your corners have small gaps or angles that don’t meet cleanly. Fix: Always check and calibrate your saw’s 0° position with a machinist’s square before starting a precision project.
Frequently Asked Questions
What is a miter saw used for?
A miter saw is primarily used for making precise crosscuts, miter cuts, bevel cuts, and compound cuts in wood. Common applications include cutting trim, crown molding, baseboards, door casings, framing lumber, deck boards, and furniture components. It excels at any task requiring accurate, repeatable angle cuts.
What is the difference between a miter saw and a chop saw?
These terms are often used interchangeably but they are different tools. A chop saw is designed for cutting metal and cuts only at 90° — the blade does not rotate or tilt. A miter saw is designed for wood (and other materials) and can rotate and tilt to make angled cuts. A miter saw is not a chop saw.
What is the difference between a compound miter saw and a sliding miter saw?
A compound miter saw’s blade tilts to make bevel cuts in addition to miter cuts. A sliding miter saw has horizontal rails that let the blade move forward and back to cut wider boards. A sliding compound miter saw does both. Most professionals prefer a sliding dual bevel compound saw for maximum versatility.
Can a miter saw cut 4×4 lumber?
A 12-inch miter saw can cut a 4×4 in a single pass. A 10-inch miter saw may require two passes (one from each side) to cut through a 4×4. A 10-inch sliding miter saw can often cut a 4×4 in one pass due to its extended reach.
What size miter saw should I buy?
For most homeowners and serious DIYers, a 10-inch sliding compound miter saw hits the sweet spot of capacity, portability, and price. For professional contractors or those frequently cutting 4×4 or larger lumber, a 12-inch sliding dual bevel compound is the better choice.
Can a miter saw cut metal?
With the correct blade, yes — some miter saws can cut aluminum and other non-ferrous metals. However, a dedicated chop saw or cold saw is the better tool for regular metal cutting. Never use a standard wood blade to cut metal.
Is a miter saw the same as a circular saw?
No. A circular saw is a handheld tool where you move the saw across the material. A miter saw is stationary — the material doesn’t move; the blade comes down to it. Both use circular blades, but they’re used very differently and produce different levels of precision.
How accurate is a miter saw?
A properly calibrated miter saw is one of the most accurate power saws available, capable of cuts accurate to within a fraction of a degree. This is why it’s the preferred tool for trim carpentry, where gaps of even 1/32″ are visible and unacceptable.
What is the best miter saw for beginners?
For beginners, a 10-inch single or dual bevel compound miter saw from a reputable brand (Dewalt, Makita, Bosch, Milwaukee, or Ridgid) is ideal. It’s easy to use, handles most common projects, and won’t overwhelm a new woodworker. Look for one with a laser guide to help with cut alignment.
How do I cut crown molding with a miter saw?
Crown molding can be cut two ways: standing the molding upright against the fence at its spring angle (nested cut method), or laying it flat on the table and using compound angle settings. For a 90° inside corner using the nested method: set the miter to 45° left for the left piece and 45° right for the right piece, with the bevel at 0°. Crown molding angles can vary — always test on scrap before cutting your finish pieces.
Final Thoughts: Is a Miter Saw Worth It?
Without question — yes. If you do any woodworking, trim work, home improvement, or DIY construction, a miter saw is one of the highest-value tools you can own.
No other saw matches its combination of speed, accuracy, and ease of use for crosscuts and angle cuts. It’s the first tool a finish carpenter reaches for every single morning, and it’s the tool that transforms a DIYer’s results from “close enough” to genuinely professional-looking.
Start with a 10-inch sliding compound miter saw, learn the four cut types, and practice on scrap wood before your first real project. Once you’ve made your first perfect miter joint or cleanly installed your first length of crown molding, you’ll understand exactly why every serious woodworker owns one.
Explore More from Saw Theory:
- Best Miter Saw Reviews & Buying Guide
- Best 10 Inch Miter Saw
- Best Sliding Compound Miter Saw
- Different between Table Saw Vs Miter Saw
- The 5 Best Miter Saw Stands
Matthew Jackson is the founder of Saw Theory and a woodworking and power tool expert with more than a decade of hands-on experience in finish carpentry, framing, land management, and outdoor power equipment. He has tested and reviewed hundreds of saws, blades, and cutting tools for homeowners and professionals alike.
Table of Contents