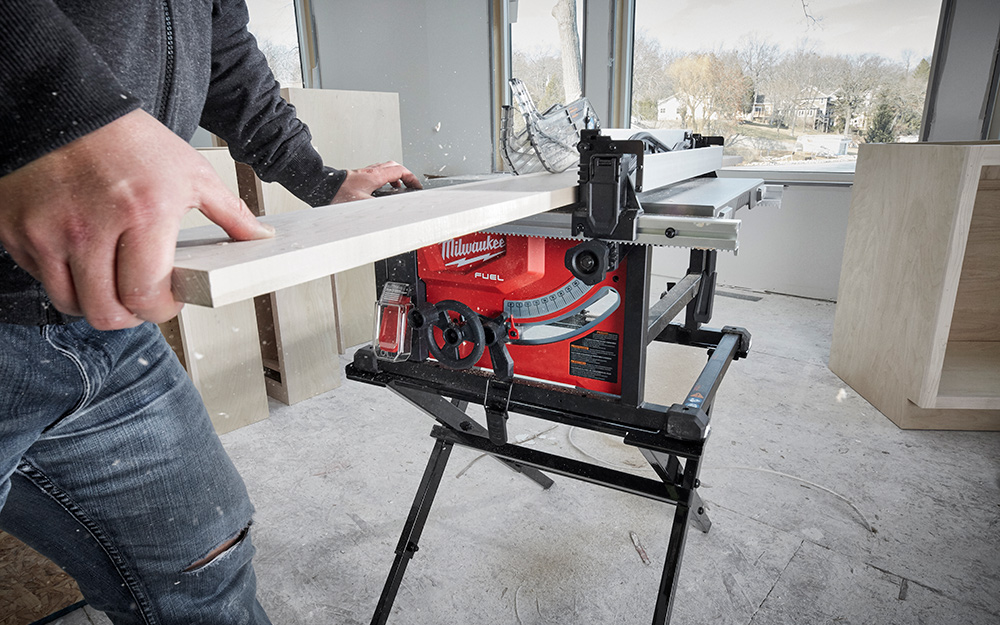
A table saw is one of the most versatile tools in a woodshop. With the right blade, a table saw can make rip cuts, crosscuts, miter cuts, and more. To use a table saw, start by adjusting the blade to the correct height for the material you’re cutting.
Then, hold the piece of wood firmly against the fence with one hand and use the other hand to push it through the blade. For a rip cut, keep the piece of wood flat against the fence while you’re cutting; for a crosscut, hold it at an angle. Make sure to keep your fingers well away from the blade!
- Read the table saw manual before using the tool.
- Set up the table saw according to the instructions in the manual.
- Place a piece of wood on the saw table and align it with the blade.
- Use one hand to hold the wood in place and use your other hand to operate the saw.
- Slowly push the blade into the wood until it is fully inserted.
- Turn on the blade by depressing the switch or trigger and then allow it to come up to full speed before making your cut.
How to Use a Table Saw to Rip Boards
If you’re new to woodworking, the thought of using a table saw can be intimidating. But with the right instruction and a little practice, ripping boards on a table saw is actually quite easy! Here’s how to do it:
1. First, set up your table saw according to the manufacturer’s instructions. This includes attaching the blade guard and making sure that the blade is properly aligned with the miter gauge.
2. Next, measure and mark your board at the desired width. Make sure that your marks are straight and parallel to each other.
3. Now it’s time to make the cut! Position your board on the table saw so that the blade will cut through your marked line. Slowly and carefully guide the board through the blade, keeping your hands well away from the moving parts.
4. Once you’ve made it all the way through, turn off the table saw and unplug it before removing your board. Congratulations – you’ve just ripped your first board on a table saw!
Credit: www.homedepot.com
What are 3 Safety Rules for a Table Saw?
When using a table saw, there are three main safety rules to follow in order to avoid injury. First, always use the blade guard. This is a clear plastic cover that sits over the blade and helps to prevent kickback.
Second, never reach across the table saw while it is running. Always turn off the power and wait for the blade to stop spinning before reaching for anything on the other side of the saw. Finally, be careful not to get your fingers too close to the blade.
Keep them well away from the path of the blade at all times.
Which Way Do You Push Wood Through a Table Saw?
Most table saws are designed for right-handed users. This means that the blade is on the right side of the table and the operator pushes the wood through with their right hand. Some table saws are designed for left-handed users, which means that the blade is on the left side of the table and operators push the wood through with their left hand.
What Thing Can You Do With a Table Saw?
A table saw is one of the most versatile tools in a woodworker’s arsenal. With the right blade, a table saw can make rip cuts, crosscuts, dadoes, rabbets, and even compound cuts.
How Do You Cut Small Pieces of Wood With a Table Saw?
Assuming you’re talking about cutting lumber into smaller pieces for a project:
You can cut small pieces of wood with a table saw by first setting the blade to the desired height. Next, measure and mark the wood where you want to make the cut.
Then, line the wood up with the blade and push it through slowly and evenly. Finally, use a hand saw or power saw to finish any cuts that are too small for the table saw.
A step-by-step guide to making your first table saw cuts. TABLESAW BASICS.
Conclusion
Table saws are one of the most versatile tools in a woodshop. With the right blade, they can make rip cuts, crosscuts, and even dadoes and rabbets. In this post, we’ll show you how to use a table saw for each of these cuts.
First, let’s talk about safety. Always use push sticks or other safety devices when making rip cuts on a table saw. The blade can grab the workpiece and pull it towards you, which could cause serious injury.
When making crosscuts or dadoes, you can use the fence as a guide. Just be sure to keep your hands well away from the blade. Now let’s get started!
For a rip cut, set the blade to full height and position the workpiece against the fence so that the cut will be made along the length of the board. Slowly push the workpiece through the blade, keeping it flush with the fence. For best results, use a sharp carbide-tipped blade designed for ripping wood.
Crosscuts are made by setting the blade to half height and positioning the workpiece at 90 degrees to the fence. Again, slowly push it through until it’s completely cut through. You can make repeated crosscuts by flipping over your workpiece after each cut – just be sure that all sides are properly supported before cutting again.
Dadoes are L-shaped cuts that are often used for joining boards together or creating shelves and drawers. To make one , set your table saw Blade to 3/4 ” high And position The Fence 1/4″ From The outside Edge of The Blade . Then , holding The Work piece flush Against The Fence , feed It into The Blade .
Finally rotate The Work piece 90 degrees And feed It Through again To complete The dado .
Table of Contents