Using a Ryobi table saw is simple and straightforward. First, make sure to assemble the saw correctly and adjust the height of the blade for your particular task. Then, align your workpiece with the miter gauge on the side of the table saw and secure it in place with clamps or other securing devices.
Next, turn on the power switch located on either side of the machine and engage both safety switches located at each end of its base. Finally, hold down firmly onto your workpiece while pushing it through slowly but steadily until you reach your desired cut length or shape. Make sure to keep fingers away from any moving parts as you use a Ryobi Table Saw!
- Set Up the Table Saw: Before using your Ryobi table saw, make sure that it is properly set up and secured to a workbench or other surface
- Be sure to read all of the safety instructions in your user manual before beginning use
- Insert the Blade: Place the blade into the arbor on the table saw and rotate clockwise until it locks securely into place with an audible click
- Make sure to check that both sides of each blade are sharpened and ready for use before proceeding further
- Adjust Blade Height: Using an adjustable wrench or socket, adjust the height of your blade until it reaches just below whatever material you intend to cut (wood, metal, plastic, etc
- You may want to refer back again at this point if needed, when cutting thicker material,s as they will require different heights than thinner materials such as plywood or particle board
- Secure Your Workpiece: Once you have adjusted your blade height accordingly, secure your piece of wood firmly against either side of the fence guides on the table saw’s top surface with clamps if necessary; otherwise, hold in place manually while cutting slowly but steadily through material along the desired line marked out beforehand with pencil/marker/etc.
- 5 Push Wood Through Saw Slowly & Steadily: With one hand pushing wood forward towards the saw’s rotating blades while keeping the opposite hand behind the guard rail at all times – push wood slowly yet steadily through cutting action while being mindful not to let the stock drift off course from its intended line due to gravity pull during downward motion across the blades’ rotation plane
Ryobi 10 Table Saw Manual
The Ryobi 10 Table Saw Manual is an invaluable guide for any DIYer or professional carpenter. It provides comprehensive instructions and diagrams to help you set up, operate, and maintain your saw safely and effectively. The manual also includes information on troubleshooting common problems with the saw so that you can get back to work quickly without having to call in a technician.
Whether you are looking for basic maintenance tips, safety recommendations or more advanced repair advice, the Ryobi 10 Table Saw Manual has it all!
Ryobi Table Saw Guide Rail
The Ryobi Table Saw Guide Rail is an essential accessory for any workshop or garage. This guide rail attaches to the side of your table saw and allows you to make precise, accurate cuts with minimal effort. The guide rail features a heavy-duty aluminum construction that ensures stability and accuracy when cutting materials such as wood, metal, plastic, and more.
With its adjustable design, you can customize the length of the guide rail to fit most table saws on the market today. Make sure you have one in your shop for all of your woodworking projects!
Ryobi Table Saw Assembly
Assembling a Ryobi Table Saw is easy and straightforward. With clear instructions, it can be done in as little as 30 minutes. All necessary tools for assembly are included with the saw, along with a detailed guide that takes you through each step of the process.
Once assembled, your Ryobi Table Saw will be ready to use for years to come!
How to Use a Ryobi Saw
To use a Ryobi saw, start by making sure that the blade is in good condition and securely fastened to the saw. Then, measure and mark your cut line on the material you’re working with. Use a straight edge or level to ensure accuracy of the cut line.
Securely clamp down the material on a workbench or other flat surface before starting your cut. Finally, press the trigger switch and slowly guide the saw along your pre-marked cut line until you make it all of way through.
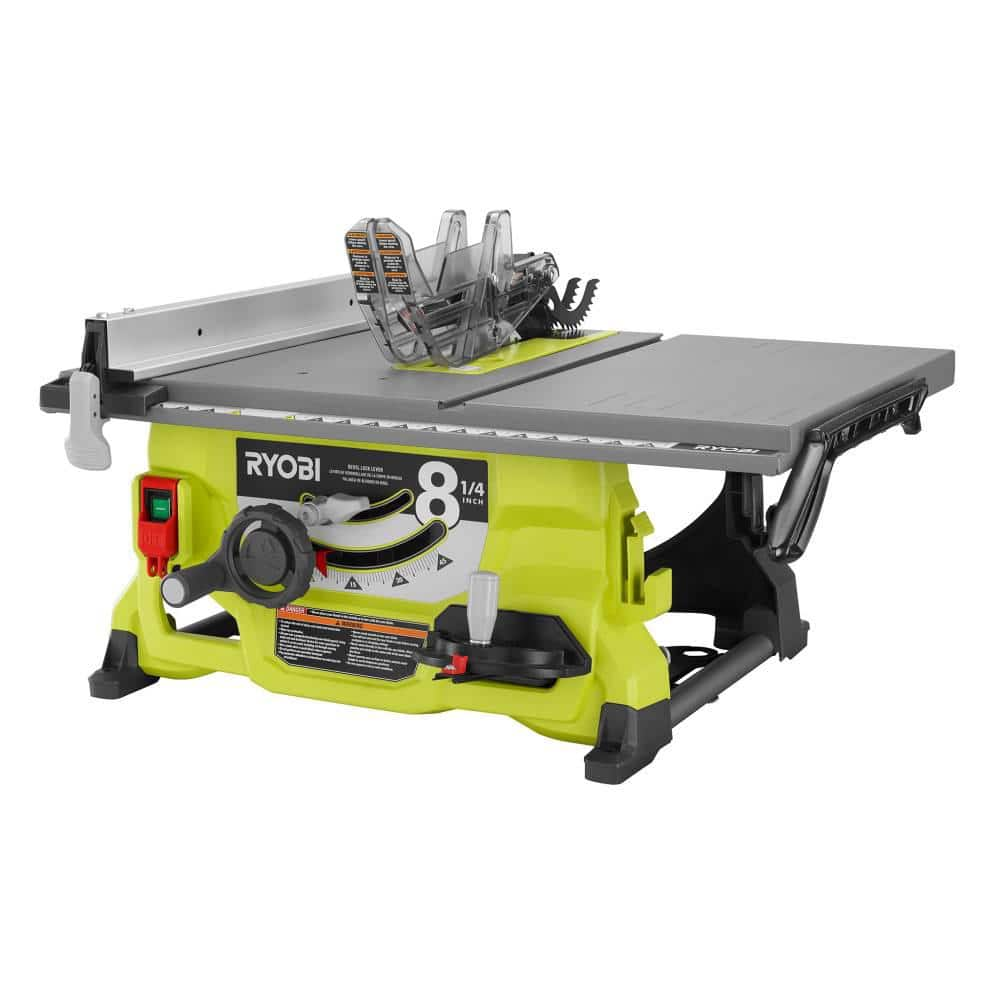
Credit: www.homedepot.com
How Do You Use a Table Saw Step by Step?
To use a table saw, the first step is to make sure that it is properly set up and secured. Make sure that your table saw has been adjusted for blade height, fence alignment, and miter slot angle. Next, you’ll need to select the proper blade for the job at hand – if cutting thick material or hardwood, choose an appropriate carbide-tipped blade with plenty of teeth.
After selecting the right blade, adjust its height so it’s just above whatever material you are cutting. Now turn on your table saw and ensure that all guards are in place before pushing any materials through the machine. Once everything is set up correctly, you can begin feeding stock into the blades using push sticks or feather boards where necessary – always remember to keep both hands away from the moving parts when operating!
Finally, after completing each cut, be sure to switch off your table saw before clearing away any debris created during operation.
How Do You Set Up a Ryobi Table Saw?
To set up a Ryobi table saw, begin by gathering all the necessary components and setting them on a flat surface. Unpack the saw base and stand, then attach the base to the stand with four screws. Then place one of the side rails onto the base and align it with one of its mounting holes.
Secure it in place with two screws before repeating these steps for attaching the other rail. Next, secure both mitre slots in place by inserting each T-nut into its slot and tightening it down using an Allen wrench. Finally, adjust your blade height using a hex key or screwdriver, depending on your model’s specifications.
Once you have finished this process your Ryobi table saw should be ready to use!
How Do You Use the Miter on a Ryobi Table Saw?
Using a miter on a Ryobi table saw is simple and straightforward. To use the miter, start by unlocking the fence with the lever located on the right side of the saw. Then, adjust your cutting angle using two knobs on either side of the saw’s base to set your desired degree.
Finally, align your material along with the fence and make sure to hold it in place as you turn on your power switch. Once powered up, move your material through at a consistent speed for an accurate cut every time!
How Do You Unlock a Ryobi Table Saw?
Before attempting to unlock your Ryobi table saw, it is important to make sure the power switch is in the off position. To unlock the saw, begin by pressing down on the blade guard and lifting up on the lock lever. This should release any tension that was built up when you locked it previously.
Once unlocked, you can adjust or replace blades as needed and then securely re-lock before beginning your cutting task. It is essential to remember that safety comes first; always ensure that all components are properly secured before operating your Ryobi table saw.
How To Set Up Your New Ryobi Portable Table Saw
Conclusion
In conclusion, the Ryobi table saw is a great tool to have in your workshop. With its easy-to-use features and durable design, it can provide you with reliable and accurate cuts for years to come. Use the tips outlined in this blog post to set up and use your Ryobi table saw correctly, ensuring precision results every time.
Table of Contents