To change the blade on a Ryobi table saw, first disconnect the power cord from the outlet. Then, remove the throat plate by unscrewing the four screws that hold it in place. Next, loosen the arbor nut with a wrench and remove the old blade.
To install the new blade, reverse these steps. First, hand-tighten the arbor nut to secure the blade in place. Then screw on the throat plate and reconnect the power cord to resume use.
- Disconnect the power cord from the outlet and make sure that the saw is turned off
- Remove the throat plate by unscrewing the four screws that hold it in place
- Unplug the blade wire harness from underneath the table
- Use a wrench to loosen the arbor nut, then remove it completely
- Take off the old blade and install the new one, making sure that it is tight against the arbor flange
- Plug in the blade wire harness and replace the throat plate before turning on your saw again
Ryobi Table Saw Blade Removal Tool
If you’re a Ryobi fan, then you know that their table saws are some of the best on the market. But what you may not know is that they also offer a handy tool to help with blade removal. The Ryobi Table Saw Blade Removal Tool is designed to make removing and replacing your saw blades quick and easy.
Simply insert the tool into the blade arbor and twist it to loosen the blade. Then, use the included Allen wrench to remove the blade nut. It’s that simple!
This handy tool is a must-have for any Ryobi table saw the owner and it’s available at most home improvement stores or online retailers. So next time you need to change out your saw blades, be sure to pick up a Ryobi Table Saw Blade Removal Tool first – it’ll make the job a whole lot easier!
Credit: ryobitools.com
How Do You Change a Saw Blade on a Ryobi Table Saw?
If you’re working with a Ryobi table saw, sooner or later you’re going to need to change the blade. It’s an inevitable part of the woodworking process. Fortunately, changing the blade on a Ryobi table saw is relatively straightforward and can be done in just a few minutes with the right tools.
Here’s a step-by-step guide on how to do it:
1) Unplug the saw from its power source and make sure that it’s turned off. You don’t want to accidentally start the saw while you’re changing the blade.
2) Raise the blade guard and release the tension on the blade by loosening the bevel lock knob.
3) Use a wrench or socket to loosen the arbor nut that holds the blade in place. You may need to use some force to get it started, but don’t overdo it – you don’t want to strip the threads.
4) Carefully remove the old blade from the table saw and dispose of it properly.
How Do You Put the Blade on a Ryobi 8 1 4 Table Saw?
If you’re looking to put a blade on your Ryobi 8 1/4″ table saw, there are a few things you’ll need to do first. First, make sure the power is off and the blade is not spinning. Next, loosen the arbor nut with the wrench that came with your saw.
Once the nut is loose, you can remove the old blade and install the new one. Be sure to line up the teeth on the new blade with those on the arbor flange. Finally, tighten down the arbor nut until it’s snug.
How Do You Put a Blade Guard on a Ryobi 10 Table Saw?
Most Ryobi 10 table saws come with a blade guard already attached. If yours does not, or if you need to replace the guard, here is how to do it. First, make sure the power is off and the blade has stopped spinning.
Then, loosen the two screws that hold the throat plate in place. This will allow you to remove the plate and access the blade. Next, take off the old blade guard by removing the four screws that hold it in place.
Be careful not to touch the blade itself. Now, put on the new blade guard by aligning it with the holes in the throat plate and screwing it in place with four screws. Make sure the guard is level and tight against the blade before tightening all of the screws completely.
Finally, put the throat plate back on and tighten its two screws. Your Ryobi 10 table saw is now ready for use with a new, properly-attached blade guard!
How Do You Change a Blade on a Table Saw?
If you’re new to woodworking, the thought of changing a blade on a table saw can be daunting. But don’t worry – it’s actually quite simple! With just a few basic tools and a little bit of know-how, you’ll be changing blades like a pro in no time.
First, you’ll need to gather your supplies. You’ll need a new blade, of course, as well as an Allen wrench or hex key (this is usually included with the new blade). You’ll also need a pair of gloves and safety glasses.
Trust us – you don’t want to be messing around with a sharp blade without them! Once you have your supplies gathered, it’s time to get started. First, unplug your table saw – safety first!
Then, using the Allen wrench or hex key, loosen the bolt that holds the blade in place. Be sure to hold onto the blade while you do this – otherwise, it could fall and injure you. Once the bolt is loosened, carefully remove the old blade from the table saw.
Now it’s time to install the new blade. Again, use caution as you handle the sharp edges of the blade.
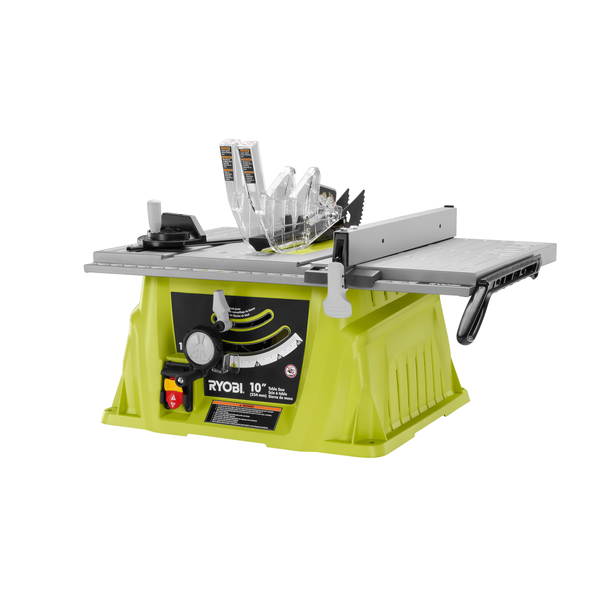
How to Replace a Ryobi Table Saw Blade
Conclusion
If you have a Ryobi table saw, you may need to change the blade at some point. Here’s how to do it:
1. Unplug the table saw and make sure it’s turned off.
2. Remove the blade guard by loosening the screws that hold it in place.
3. Use an Allen wrench to loosen the bolt that holds the blade in place.
4. Carefully remove the old blade and install the new one, making sure that it is tight before replacing the blade guard and screwing it back into place.
Table of Contents