Renovation projects can be transformative, but even the most enthusiastic DIYer can be discouraged by the thought of removing old, stained, or cracked grout. Manual scrapers were used for years to complete this tedious and backbreaking task. Fortunately, modern technology has given us a superior solution. Multi-tools that oscillate have completely revolutionized multitasking, transforming a difficult task into one that can be accomplished with great precision and ease. A small but mighty accessory is the key to this efficiency: the tile grout cutting blade.
The right grout removal blade for an oscillating tool can save you hours of effort and protect your tiles from accidental chips and scratches. The following guide will walk you through everything you need to know. Let’s discuss how to choose the right blade for your project, how to use it safely and effectively, and how to maintain it for long-term performance. Your next tile project will be smoother and more professional than ever.
What Is a Tile Grout Cutting Blade?
The grout fills in the joints between tiles, providing stability and preventing water from leaking in. Grout can become dirty, cracked, or moldy over time, necessitating its removal and replacement to refresh the surface. Tile grout cutting blades are specialized accessories that are attached to oscillating multi-tools. The purpose of this tool is to remove old grout without damaging the surrounding tiles.
Grout blades attached to oscillating tools move back and forth at high speeds, making thousands of tiny cuts per minute. As a result of this rapid oscillation, grout is pulverized efficiently. Different shapes and materials are available for these blades, primarily carbide and diamond. You should choose the right type based on the hardness of your grout and the specific requirements of your project. Both professionals and DIY enthusiasts use this simple but effective oscillating grout blade.
Why Use an Oscillating Tool for Grout Removal?
Grout oscillating tools have significant advantages in terms of speed, precision, and safety compared to manual grout removal tools. Grout rakes, for example, are slow and require a significant amount of physical effort, often resulting in fatigue and inconsistent results. An oscillating tool, on the other hand, does most of the work for you.
Precision is the primary benefit. As a result of its controlled, high-frequency oscillations, the tool significantly reduces the risk of chipping or scratching your tiles. A more aggressive tool, like an angle grinder, makes this much harder to accomplish.
It is also incredibly versatile to use a grout oscillating tool. By simply swapping out the head, you can use a grout removal blade, a sanding pad, or even a scraper. As a result, it is a multi-purpose powerhouse that can be used for any renovation project. Compared to other power tools, the oscillating grout blade produces less airborne dust, making cleanup easier and the work environment healthier.
Types of Grout Removal Blades
For a successful project, you need to choose the right multi-tool grout blade. Different types of grout and applications require different types of blades based on their materials and shapes.
Material Types
- Carbide Grout Removal Blade: These are the most common and most affordable blades. The cutting edge is coated with carbide grit, which grinds away softer materials such as cement-based grout. While they are a great choice for general-purpose grout removal, they may wear down more quickly when applied to very hard or epoxy-based grouts.
- Diamond Grout Blade: A diamond blade performs better at tougher tasks. This edge is embedded with industrial-grade diamond particles, making it incredibly durable and efficient at cutting through epoxy grout, sanded grout, or old, hardened cement grout. Although diamond grout blades are more expensive, they last longer and provide faster, smoother cuts.
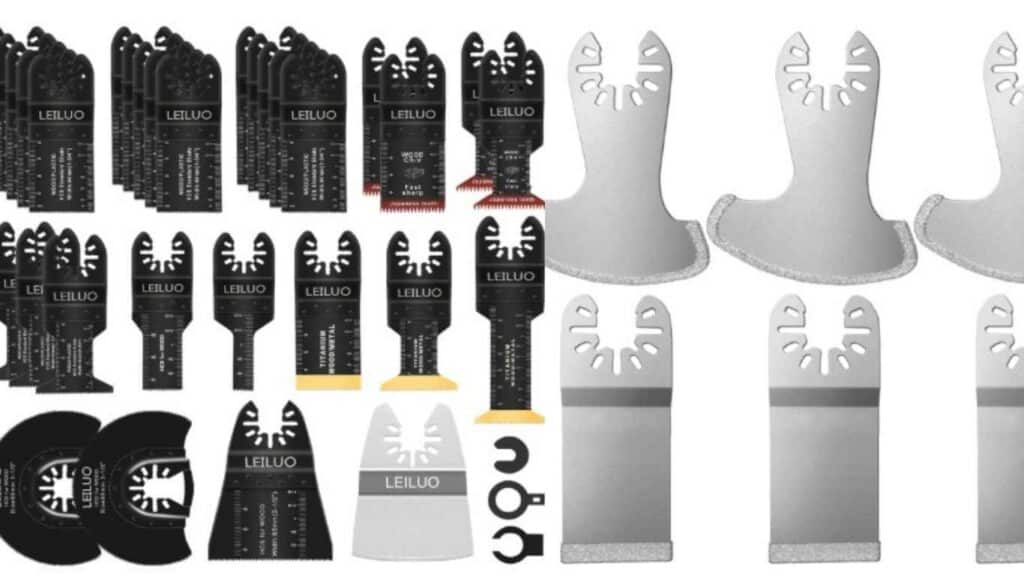
Shape and Design
- Segmented (Straight) Grout Blade: These blades have straight edges and are ideal for working along long grout lines. The design enables precise control and facilitates easy entry into tight 90-degree corners.
- Round Grout Blade: Round or semi-circular blades offer greater versatility. Especially useful for removing grout from wider joints or irregular areas, it can be used in any direction. It can, however, be more challenging to control in tight corners than a segmented blade.
When you understand these options, you can choose the most effective grout removal blade for your oscillating tool.
How to Choose the Best Grout Removal Blade for Oscillating Tools
When selecting a grout removal blade for an oscillating tool, several key factors should be considered. Choosing the right tile will ensure efficiency and protect your investment.
- Grout Hardness: This is one of the most important factors to consider. It is usually sufficient to use a carbide blade for soft, non-sanded grout. Diamond blades are essential for hard, sanded, or epoxy grouts. Using a carbide blade on hard grout will wear it out rapidly and cause it to overheat.
- Blade Size and Shape: It is important to consider the width of your grout lines when choosing a blade. Blades should be slightly narrower than grout joints to prevent hitting tiles. In general, a 1/8-inch or 1/16-inch blade is used for grout lines. Long, straight runs are best controlled with a segmented blade. It may be more practical to use a round blade for joints with curved edges or areas with wider joints.
- Tile Type: Take the material of your tile into consideration. Although grout blades are designed to minimize contact with tiles, accidents can still occur. It may be worthwhile to invest in a high-quality diamond blade when working with delicate materials such as natural stone or glass. Blades designed for removing tiles should not be confused with grout removal blades, such as multi-tool tile removal blades.
- Tool Compatibility: Make sure the blade is compatible with your oscillating multi-tool. Many brands now offer “universal fit” arbors, which are compatible with most major tool brands, including DeWalt, Milwaukee, and Ryobi. Some tools, particularly those with quick-change systems such as Fein Starlock or Dremel, may require specific blade mounts. To ensure compatibility, always check the packaging for details.
With the right multi-tool grout removal blade, you will get clean, efficient results that match your grout type, joint width, and tool model.
Step-by-Step Guide: How to Use a Grout Blade for Tile Removal
When you have a grout blade for an oscillating tool, it’s time to get to work. The following steps will ensure that grout is removed safely and effectively.
Step 1: Prepare Your Workspace and Gear Up
Safety comes first. Grout removal produces fine dust that is harmful to inhale. Make sure you wear safety glasses, a dust mask, and gloves. You can protect your tiles by applying painter’s tape along the grout lines. As a result, accidental scratches are prevented.
Step 2: Attach the Grout Blade
Make sure your oscillating tool is unplugged. Follow the instructions that come with your tool when attaching the tile grout cutting blade. Check that it is tight and does not wobble.
Step 3: Start Removing Grout
Choose a medium speed for your oscillating tool. A lower speed gives you more control, whereas a higher speed removes material more quickly. Turn on the tool, place the blade in the grout line, and let the blade do its work. Apply gentle pressure when using the tool; avoid applying excessive pressure.
Step 4: Work in Sections and Clear Debris
Follow the grout lines steadily with the tool. To make things easier, work in small, manageable sections. Periodically vacuum away grout dust with a shop vacuum. A clear view of your progress will help you avoid dust getting packed into the joint again.
Step 5: Inspect and Finish
Make sure there are no remaining bits of grout in the lines after the bulk of the grout has been removed. The edge of the multi-tool grout removal blade or a utility knife can be used to clean up the corners and edges.
Maintenance Tips for Grout Blades
Grout blades can be extended significantly in life through proper care and will perform well for many years to come.
- Clean After Use: Wipe down the blade after each use to remove any caked-on grout dust. To remove stubborn particles from the grit, use a stiff brush.
- Avoid Overheating: Overheating can occur when the tool is used too aggressively or at maximum speed for an extended period. Cutting efficiency can be reduced if the carbide coating or diamond coating is damaged. If the tool feels excessively hot, use a medium speed and let it rest.
Know When to Replace: Oscillating grout blades are consumables. When it takes longer to cut through grout or burnishes grout rather than removing it, it’s time to replace it. Using a dull blade increases the risk of slipping and damaging tiles.
Common Mistakes to Avoid During Grout Removal
To achieve professional-looking results without damaging your tiles, avoid these common pitfalls.
- Applying Too Much Pressure: Allow the tool’s oscillating speed to do the work for you. By forcing the blade into the grout, you can lose control, damage the tile, and prematurely wear out the blade.
- Using the Wrong Blade: To remove epoxy grout with a carbide blade is an exercise in frustration, as we have already discussed. Multi-tool grout blades should be matched to the material being cut.
- Ignoring Safety: Grout dust contains silica, which is harmful when inhaled. Wear a mask and eye protection at all times. On expensive tiles, skipping protective tape can also lead to costly scratches.
- Rushing the Corners: Corners require extra attention. It is best to use a straight, segmented tile grouting blade for better precision and to work slowly so as not to overcut into the adjacent joint.
Best Practices for Multi-Tool Tile and Grout Removal
A full renovation may require removing both grout and tiles. Oscillating tools are also excellent for this.
Multi-tool tile removal blades, which are typically wider and more flexible, can be used to slip underneath tiles and break their adhesive bonds. First, remove all the grout surrounding the tile with a grout blade. As a result, the tile is isolated and stress is not transferred to neighboring tiles. After that, use a tile removal blade to pry it up.
Starting at the top and working your way down is the best way to clean vertical surfaces, like shower walls. In this way, debris can be thrown away from your work area. When cleaning floors, start in a corner and work your way out. A multi-tool blade can be used to remove grout and tiles simultaneously, allowing you to complete the tear-out with just one tool.
Frequently Asked Questions (FAQ)
1. What is the best blade to remove grout from between tiles?
Depending on the type of grout, you will need a different blade. A carbide blade is ideal for standard cement-based grouts. For harder materials, such as epoxy or grout, sanding with sandpaper yields significantly better results when using diamond blades. It is often better to use a blade with straight segments for precision work.
2. Can I use an oscillating tool to remove tile grout?
Yes, absolutely. Grout can be removed using an oscillating tool, which is one of the most effective and popular methods. The machine offers a great balance of speed, precision, and control, which makes it ideal for removing grout efficiently without damaging the surrounding tiles.
3. What’s the difference between diamond and carbide grout blades?
The main difference between the two is the durability and cutting performance. A carbide blade is coated with carbide grit and is especially useful for softer grouts. A diamond blade contains industrial diamond particles, making it stronger and longer-lasting. Grout materials that are very hard can be cut easily with these cutters.
4. How long does a grout removal blade last?
The lifespan of a grout blade depends on its material, the hardness of the grout, and how you use it. Carbide blades might last for a small bathroom project, while diamond blades can handle multiple rooms. When it cuts slowly and requires more pressure to work, the blade is worn out.
Conclusion
Rerouting is one of the best ways to revitalize a tiled space, and the right tools make all the difference. With a high-quality tile grout cutting blade, you can complete this challenging task quickly and accurately. With the right blades, you can remove old grout safely and cleanly, paving the way for a new, beautiful finish.
Don’t let worn-out grout ruin the appearance of your home. Make your next tile project effortless by choosing the best grout removal blade for your oscillating tool.
Table of Contents