Welding band saw blades is not difficult, but there are a few things to keep in mind. First, the teeth must be ground down flush with the top and bottom of the blade. Second, the weld needs to be on the top side of the blade so that it does not interfere with the cutting action.
Third, use a low-heat setting on your welder and do not overheat the metal. Finally, quench the blade in oil after welding to help relieve stress from the heat.
- Inspect the band saw blades for any damage
- If there is any damage, use a file or grinder to remove any burrs or sharp edges
- Clean the band saw blades with a wire brush to remove any dirt or debris
- Set up your welding machine according to the manufacturer’s instructions
- Place the two band saw blades together so that the teeth are aligned and weld them together at the joint
- Allow the weld to cool before using the band saw again
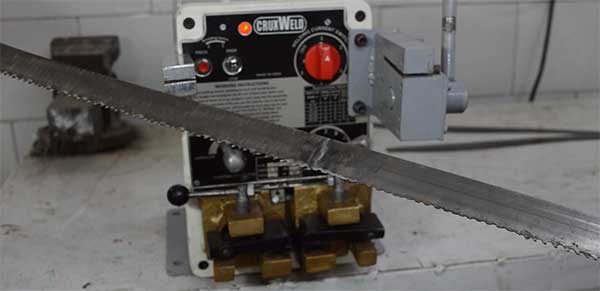
Credit: www.cruxweld.com
Why Do Bandsaw Blades Break at the Weld?
Bandsaw blades are made of high carbon steel. This makes them tough and durable, but also susceptible to breaking at the weld. The most common reason for this is because the blades are not properly tensioned.
When they are not tensioned correctly, the blade can vibrate and break at the weld. Another reason for breaking at the weld is because of wear and tear. Over time, the band saw blades will start to wear down and this can cause them to break at the weld.
Can a Bandsaw Blade Be Welded?
Bandsaw blades can be welded, but it’s not a common practice. The main reason for this is that bandsaw blades are made of high carbon steel, which is difficult to weld. If you’re experienced in welding and have the proper equipment, you can weld a bandsaw blade.
However, it’s important to note that welding high carbon steel can be tricky and dangerous, so it’s not recommended for beginners.
How Do You Coil And Uncoil a Bandsaw Blade?
Bandsaw blades are made of tough, flexible steel and can be quite long, making them difficult to handle. To make it easier to work with a bandsaw blade, you can coil it up. This also helps to protect the blade from damage.
To coil a bandsaw blade, start by holding one end of the blade in your non-dominant hand. Then, use your other hand to wrap the blade around itself, starting at the teeth and working towards the back of the blade. Keep wrapping until you’ve made 1-2 complete turns.
Finally, tuck the end of the blade under itself to secure it in place.
To uncoil a bandsaw blade, start by holding one end of the blade in your non-dominant hand. Use your dominant hand to carefully unwind theblade, being careful not to cut yourself on the sharp teeth.
Once you’ve completely unwound the blade, you can use it as normal.
How are Bandsaw Blades Joined?
Bandsaw blades are joined together by welding. The most common type of welding used is electrical resistance welding, which uses heat to weld the two pieces of metal together. The other type of welding used is friction welding, which uses friction to weld the two pieces of metal together.
Bandsaw blade welding
Diy Bandsaw Blade Welder
A do-it-yourself bandsaw blade welder can save you money and time when compared to taking your blades to a professional welder. With the right tools and a little bit of know-how, you can easily weld new teeth onto your bandsaw blades at home. Here’s everything you need to know about welding bandsaw blades, including what type of welder to use, how to set up your work area, and some helpful tips for getting great results.
The first step is to choose the right welder for the job. An arc welder is ideal for this task because it can easily handle the high temperatures required for welding steel. If you don’t have an arc welder, you can also use a MIG welder with flux core wire.
Just be sure that whatever type of welder you use has enough power to handle the thickness of your bandsaw blades.
Next, you’ll need to set up your work area. Clear off a large flat surface and make sure it’s well-ventilated before setting up your welder.
It’s also important to wear protective gear, including gloves, a face mask, and eye protection. Once everything is in place, you’re ready to start welding!
When welding new teeth onto your bandsaw blade, it’s important to start at the top of the tooth and work your way down.
This will help ensure that each tooth is evenly welded onto the blade. You should also leave about 1/8 inch between each tooth so that they have plenty of room to move as they cut through wood or other materials. Keep these tips in mind and take your time while welding—rushing through the process could result in poor quality teeth that won’t last long or may even break off entirely while in use.
Conclusion
Are you in need of a welder to fix your band saw blades? If so, then you’ve come to the right place. In this blog post, we will show you how to weld band saw blades using a few simple steps.
So, whether you’re a beginner or an experienced welder, this guide will be helpful to you.
First, gather all of the supplies that you’ll need for the project. This includes a welding machine, welding rods, and a metal cutting blade.
Next, set up your workstation by placing the metal cutting blade on top of the welding machine. Then, turn on the welding machine and set it to the correct settings.
Now it’s time to start welding!
Begin by holding the welding rod close to the metal cutting blade. Then, slowly move the welding rod along the length of the blade. Be sure to keep a consistent speed and pressure as you weld.
Once you reach the end of the blade, turn off the welding machine and allow theblade to cool before removing it fromthe workstation.
Table of Contents