You can cut crown molding with a miter saw by placing the wood upside down and backwards against the fence to make the angles align properly. Crown molding sits at an angle between the wall and the ceiling. Therefore, cutting it requires a specific setup and strong angle awareness. This guide will teach you the exact methods for cutting inside corners and outside corners. We will also cover common mistakes and quick fixes to help you get a perfect fit. Whether you are a beginner or an experienced DIY user visiting Saw Theory, you will learn the best techniques for your project.
What You Need Before Cutting
Before you begin, gather the right tools and materials. Having everything ready makes the job much easier.
- Miter saw
- Crown molding
- Tape measure
- Pencil
- Safety glasses
- Clamps if needed
- Optional angle finder or protractor
Credit: www.woodshopdiaries.com
Understand Crown Molding Angles
Crown molding does not sit flat against the wall. It rests at a spring angle. Therefore, you must understand a few basic terms before making your first cut.
The spring angle is the exact lean the molding has when installed. The miter angle is the horizontal turn set on the base of your saw. The bevel angle is the vertical tilt of the saw blade. Furthermore, you will encounter inside corners and outside corners. An inside corner points inward, like the standard corners of a bedroom. An outside corner points outward, like a wall jutting into a hallway.
You must also choose a cutting style. The nested position involves holding the molding at an angle against the saw fence, exactly how it will sit on the wall. Meanwhile, the flat cutting method involves laying the molding flat on the saw table and using both miter and bevel angles.
| Term | What It Means | Why It Matters |
| Spring Angle | The angle the molding leans away from the wall. | Determines how the molding sits against the fence. |
| Miter Angle | The left or right horizontal swing of the saw. | Creates the directional turn of the corner. |
| Bevel Angle | The sideways vertical tilt of the saw blade. | Required only if cutting the molding flat on the table. |
Best Way to Set Up the Miter Saw
A proper setup prevents ruined wood and frustrating gaps. First, check your blade condition. A dull blade will tear the delicate edges of your molding. Next, make sure your work area is clean and well lit. You must secure the molding firmly before cutting. If you are using the nested method, the molding must sit correctly against the fence and table. Mark your cut line clearly with a pencil. Finally, always test your setup on a scrap piece of wood first. This simple step saves you from wasting expensive material.
How to Cut Crown Molding Step by Step
Follow these steps for a successful cut.
- Measure the wall length carefully.
- Mark the molding where the cut needs to happen.
- Decide whether you are cutting inside or outside corners.
- Set the saw angle according to your chosen method.
- Place the molding on the saw upside down and backwards.
- Make a test cut on a scrap piece.
- Cut the actual piece of molding.
- Dry fit the piece against the wall and the adjoining molding.
- Trim the piece slightly if needed.
- Install the molding after confirming the perfect fit.
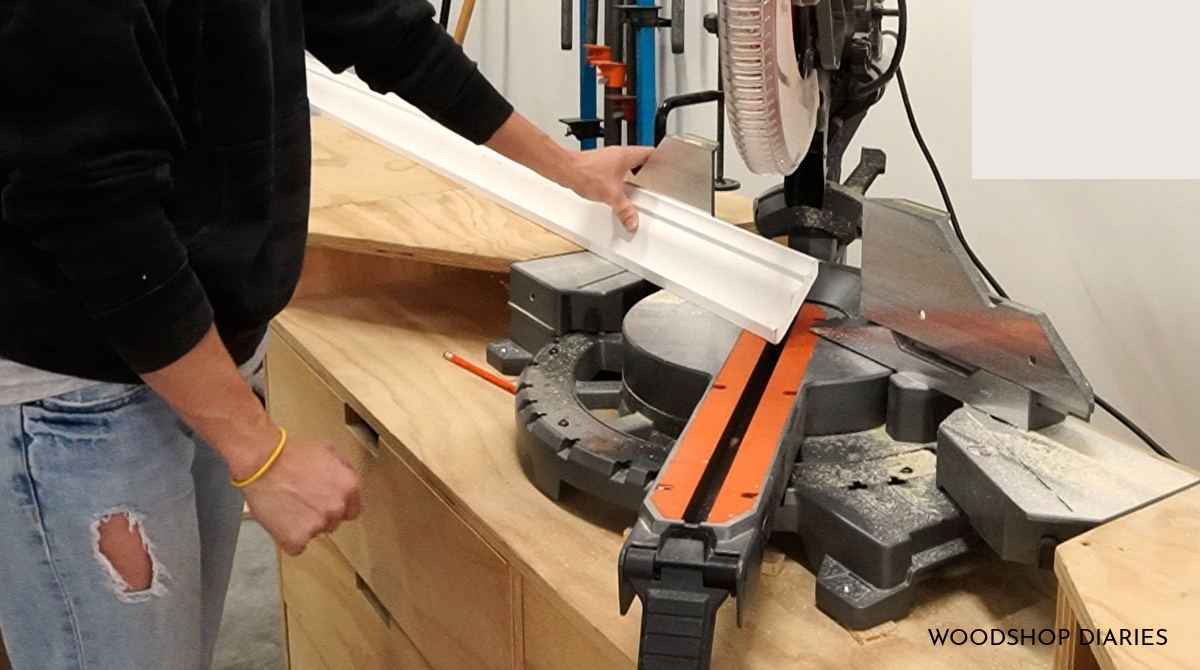
Using a Miter Saw to Cut Crown Molding
How to Cut Inside Corners
Inside corners are the most common joints in any room. To cut these, you generally place the molding upside down and backwards on the saw. The ceiling edge rests against the bottom of the saw base. The wall edge rests against the vertical fence. The fit matters greatly because gaps in inside corners are very noticeable. Also, house walls are rarely perfectly square. In these cases, coping the joint is often better than mitering it. A coped joint overlaps the other piece for a seamless look. For a deeper look at this specific process, read our complete guide on how to cut crown molding inside corners with a miter saw.
How to Cut Outside Corners
Outside corners wrap around walls that point out toward you. The cutting process differs slightly from inside corners. You still hold the molding upside down and backwards. However, the angles you set will point in the opposite direction. You must mirror the left and right pieces so they meet perfectly at the point of the corner. Dry fitting matters immensely here. You want to avoid gaps at the seam because outside corners are highly visible. Always cut the pieces slightly long. You can then shave off small amounts until the joint is tight.
Flat Cutting vs Nested Cutting
You can cut crown molding using two main techniques. The flat cutting method involves laying the wood flat on the saw table. This method requires you to adjust both the miter angle and the bevel angle simultaneously. Flat cutting is easier to visualize for some users because the wood is highly stable on the flat base.
Meanwhile, nested cutting involves leaning the wood against the fence. The wood sits at the exact spring angle it will have on the wall. You only need to change the miter angle for this method. Nested cutting can feel more natural for others and is often better for beginners.
| Cutting Method | Setup | Best For |
| Flat Cutting | Laying wood flat on the base. | Saws with smaller blades and dual bevel features. |
| Nested Cutting | Leaning wood against the fence. | Beginners and saws with tall fences. |
Common Mistakes to Avoid
Many people struggle with crown molding because they make simple errors. Avoid these common mistakes to save time and frustration.
- Cutting the wrong angle completely.
- Forgetting which side of the cut to save.
- Mixing up the left and right pieces.
- Not testing the cut on scrap wood first.
- Ignoring wall angle irregularities since most walls are not exactly ninety degrees.
- Cutting too fast, which splinters the wood.
- Using a dull blade that tears the material.
Troubleshooting Fit Problems
Even with careful planning, joints sometimes fail to line up. Here is what to do when the joint does not fit. If you see a gap at the top edge, the spring angle is off. Adjust how the molding sits against the fence. If there is a gap at the bottom edge, you need to tilt the molding slightly higher on the fence. If the piece is too short, you unfortunately have to cut a new piece. If the piece is too long, simply return to the saw and shave off a tiny sliver. For uneven wall corners, you might need to adjust your miter angle by one or two degrees. Always be prepared to recut slightly.
Best Miter Saw for Crown Molding
Having the right tool makes this job significantly easier. A good saw needs specific features to handle large trim. Compound capability is essential if you plan to cut the wood flat. Sliding capacity allows you to cut wider pieces of molding. A tall fence support is critical if you prefer the nested cutting method. You also want accurate stops and clean blade control for precise joints. If you need a new tool for your project, check out our recommendations for the best sliding compound miter saw.
When to Use a Compound Miter Saw
A compound miter saw is incredibly useful for crown molding. It allows you to tilt the blade vertically while also swinging it horizontally. This dual action is required if your molding is too large to stand up against the fence. It is the better choice for thick, wide trim pieces that must be cut flat. To learn exactly how to use this feature, read our tutorial on how to miter crown molding with a compound miter saw.
Final Tips for Cleaner Cuts
Finish your project strong with these simple tips.
- Use scrap wood first to confirm your angles.
- Label your left and right pieces lightly with a pencil.
- Keep the blade steady and let the saw do the work.
- Check corner angles with an angle finder before making final cuts.
- Work slowly on the last pass to prevent the wood from splintering.
FAQ
Can I cut crown molding with a regular miter saw?
Yes, you can cut it with a regular miter saw using the nested method. You just place the molding upside down and backwards against the fence. However, if the molding is very wide, you might need a sliding or compound saw.
What angle do you cut crown molding at?
For a standard ninety-degree corner, you typically cut the molding at a forty-five-degree miter angle. You must also account for the spring angle, which is usually thirty-eight or forty-five degrees, depending on the specific molding style.
Should crown molding be cut flat or nested?
Both methods work perfectly well. Nested cutting is often easier for beginners because it only requires changing the miter angle. Flat cutting is better for very wide molding that cannot stand up against the saw fence.
How do you cut inside corners on crown molding?
To cut inside corners, hold the molding upside down and backwards against the fence. Swing the miter saw blade forty-five degrees to the right for the left piece. Then, swing it forty-five degrees to the left for the right piece.
What is the easiest way to cut crown molding for beginners?
The easiest way is to use the nested method with a set of crown molding jigs. Jigs hold the wood at the exact spring angle automatically. This prevents the wood from slipping and ensures highly accurate cuts.
Why does my crown molding not fit the corner?
Most house corners are not exactly ninety degrees. If the walls are uneven, a standard forty-five-degree cut will leave a gap. You should use an angle finder to measure the actual corner and adjust your saw accordingly.
Table of Contents