1. Unplug the circular saw from its power source, and remove the battery if it is cordless.
2. Use the wrench that came with the saw to loosen the bolt that secures the blade.
3. Remove the old blade, and align the new one so that it rotates in the correct direction.
4. Tighten the bolt to secure the new blade in place, and re-attach any guards or covers that were removed during the process.
5. Plug in the saw or insert the battery, and test it out on a piece of scrap wood before cutting your project material to avoid any accidents.
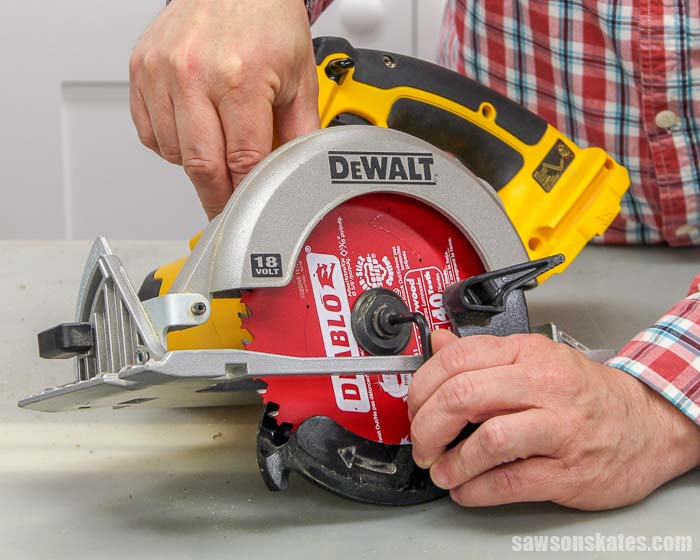
- Use the wrench that came with the saw to loosen the bolts that hold the blade in place
- Carefully remove the old blade and inspect it for damage
- If necessary, clean the arbor shaft with a wire brush to remove any built-up debris
- Line up the new blade with the arbor shaft and hand-tighten the bolts to secure it in place
- Use the wrench to fully tighten the bolts and complete changing the blade on your circular saw
Credit: sawsonskates.com
When Changing the Blade on a Circular Saw You Must First?
When changing the blade on a circular saw, you must first disconnect the power to the saw. Next, loosen the arbor nut with a wrench, which is located in front of or behind the blade (depending on your model of saw). You can then remove the old blade and install the new one.
Be sure to tighten the arbor nut securely before reconnecting power to the saw and starting it up again.
How Do You Remove a Circular Saw Blade Without a Spindle Lock?
Most circular saws come with a spindle lock that allows you to remove the blade without having to take the entire saw apart. However, if your saw does not have a spindle lock, you can still remove the blade by following these steps:
1. Unplug the saw from its power source and make sure that it is turned off.
2. Place the saw on a flat surface so that you can safely work on it.
3. Use a wrench or pliers to loosen the bolt that secures the blade in place. You may need to use an Allen wrench if your bolt is of that type.
4. Carefully remove the blade from the shaft. Be careful not to touch any of the sharp edges as you do this.
5. Inspect the teeth of the blade for damage and clean off any debris that may be present.
If necessary, use a file or sharpening stone to repair any damaged teeth before reattaching the blade..
How Do You Unscrew a Circular Saw?
If you’re looking to unscrew a circular saw, there are a few things you’ll need to keep in mind. First, make sure that the saw is unplugged and the blade is not spinning. Next, locate the two locking levers on either side of the blade.
Once you’ve found them, use a screwdriver or Allen key to loosen the lever on one side while holding the other side in place. Finally, once both sides are loosened, you should be able to unscrew the blade from the housing.
Which Way Do You Turn a Nut on a Circular Saw?
If you’re looking to make a cut with a circular saw, you’ll need to know which way to turn the nut. Depending on the model of saw, the blade might rotate clockwise or counterclockwise. You can usually find this information in the owner’s manual.
When you’re ready to make your cut, position the saw so that the blade is pointing in the direction you want it to go. Then, hold down the trigger and slowly guide the blade into the material. As you move forward, keep an eye on both the blade and your fingers – you don’t want them to get too close!
Once you’ve made your cut, release the trigger and let the blade come to a stop before setting down the saw.
How To Change Circular Saw Blades
How to Change Circular Saw Blade Without Lock
Most circular saws have a blade-change lever right on top of the motor housing, near the front handle. To use it, first unplug the saw. Then, if your saw has a spindle lock (a locking button that holds the blade in place while you loosen the bolt), engage it.
On some models, there’s a separate wrench for this purpose; on others, you just insert the blade so that its teeth are pointing up, then push down on the lever to lock it in place.
Next, locate the two bolts that hold the blade in place and loosen them with a wrench (lefty-loosy). Some models have an allen key instead of bolts; if so, use an allen key to loosen those.
With either type of fastener, once they’re loose enough, you can usually finish unscrewing them by hand.
Carefully remove the old blade—being careful not to touch its sharp teeth!—and set it aside.
Inspect your new blade to make sure its teeth are facing in the correct direction (toward the back of the saw) and then install it by reversing these steps: hand-tighten those bolts/allen screws until they’re snug, then use your wrench to give them each another quarter turn or so. Don’t overtighten! You should be able to wiggle the blade slightly side to side when everything is done correctly and tight enough.
Once your new blade is installed and secured, plug your saw back in and give her a test run on a piece of scrap wood before cutting into anything important!
Conclusion
Most circular saws come with a blade that can be changed. The process is generally pretty simple, but there are a few things to keep in mind. First, make sure the power is off and the blade is not spinning.
Next, loosen the bolt that holds the blade in place and remove the old blade. Be careful of the direction the blade comes off – it can be sharp. Finally, put on the new blade making sure it is tight before using the saw again.
Table of Contents