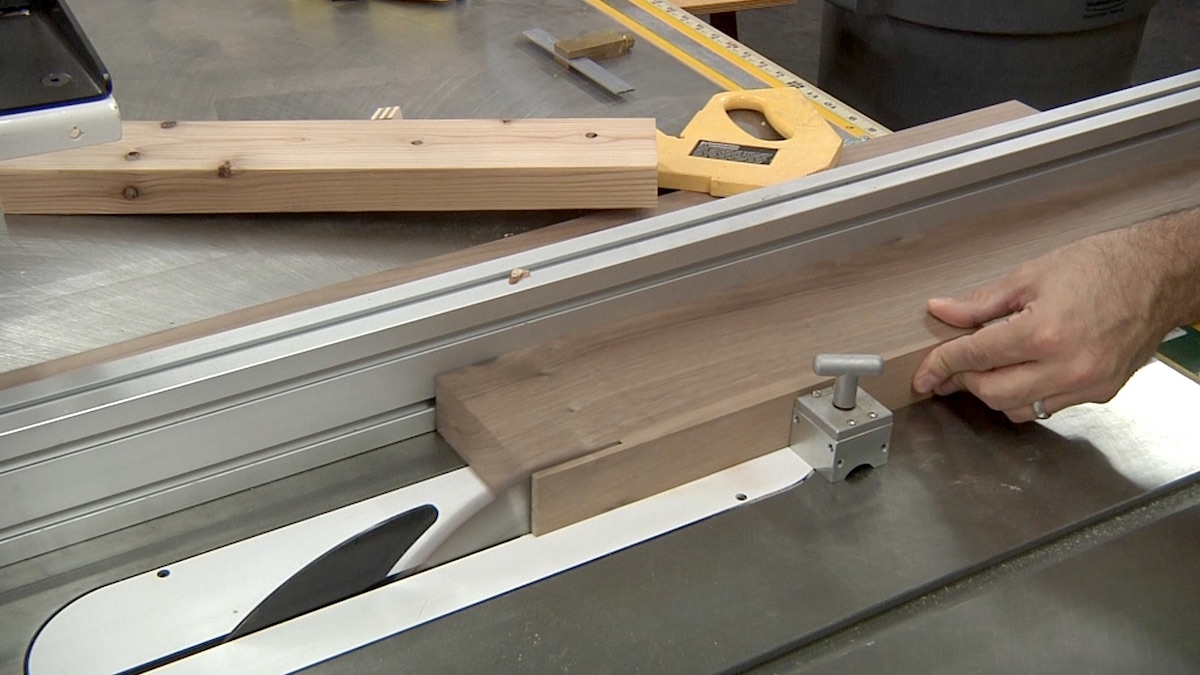
Cutting thin strips on a table saw requires the use of a special jig. The jig is designed with an adjustable fence that slides along the table saw’s miter gauge slot, allowing you to adjust the width of your cut. To start, place the wood firmly against your jig and adjust it so that its fence is parallel with your blade.
Securely clamp down both sides of your wood and make sure it won’t move when cutting. Once everything is set up, turn on your machine and slowly push forward until you’ve made a deep enough cut for what you’re looking for. Make sure to keep pressure on both sides as this will help minimize tear out from the back side of the board as well as keep things safer by preventing kickback from occurring.
When finished, simply unclamp and remove material before resetting for subsequent cuts if needed!
- Preparing Your Table Saw: Before beginning the task of cutting thin strips, it is important to make sure your table saw is properly setup
- Make sure the blade height is set low enough that it will not cut too deeply into your material and always use a push stick for added safety when making cuts with a table saw
- Setting The Fence: Next, adjust the fence so that you have an appropriate width for cutting strips of wood on your table saw
- Make sure the fence is parallel to the blade by adjusting its position along the miter slot on either side of the blade until it does not move when pushed forward or backward
- Making The Cut: With everything in place, begin slowly feeding your material through with one hand while keeping pressure against both sides of material using a push stick in your other hand as you feed it forward and backward across the blade towards and away from yourself respectively
- Stop after each pass to ensure there are no kickback issues before continuing further passes if necessary
- 4 Finishing Up : Once all desired strips are cut off, remove them from around and below any remaining stock left over near or underneath where they were originally attached to finish up this process successfully!
Credit: thewoodwhisperer.com
How Do You Cut Thin Material on a Table Saw?
To successfully cut thin material on a table saw, it is important to use the right blade and set up your saw with proper safety measures. For materials less than 1/4 inch thick, you should use a rip blade which has fewer teeth and more spacing between them. Before starting, make sure that the fence is parallel to the blade and that there are no obstructions in its path.
You can also adjust the height of the blade for thinner materials by lowering it slightly so that only one tooth at a time contacts the material being cut. Finally, when making cuts always make sure to wear protective equipment such as goggles or face masks and keep your hands away from any moving parts of the saw.
How Do You Cut the Perfect Lines on a Table Saw?
To cut perfect lines on a table saw, you should use a combination of the saw’s rip fence and miter gauge. Before beginning your project, make sure that both the blade and rip fence are parallel to one another. This can be done by adjusting either as necessary until they are perfectly aligned.
Next, set the miter gauge to your desired angle for the cut and secure it in place with a clamp or lever lock system. Once everything is adjusted properly, you can begin cutting along the line of your layout marks using slow steady passes while keeping pressure evenly applied against both the miter gauge and rip fence. If everything is lined up correctly, you should end up with clean straight cuts every time!
How Do You Cut Thin Plywood With a Table Saw?
When cutting thin plywood with a table saw, it’s important to take the right safety precautions. Start by setting your blade height to just slightly above the thickness of the plywood, so you don’t end up cutting all the way through. Next, make sure your fence is securely in place and that it will guide your cut along a straight line.
Then secure your workpiece firmly to the table with either clamps or other fasteners, such as double-sided tape. Finally, start the saw and carefully push your material into its spinning blade at a steady pace until it passes completely through on both sides. Always remember to wear protective gear when working with power tools!
Can You Cut Small Pieces on a Table Saw?
Yes, you can cut small pieces on a table saw. However, it is important to use safety equipment when doing so and to pay close attention to what you are doing. To ensure accuracy and safety when cutting small pieces on a table saw, be sure to choose the right blade for your job.
A high-tooth count blade is best suited for smaller cuts since it will provide more control over the cut than a lower tooth count blade. Additionally, make sure that your fence is set correctly with the wood firmly against it before starting any cut—this will help keep fingers away from the spinning sawblade as well as ensuring an accurate cut line. Finally, always remember to wear protective gear such as eye protection and gloves while using a table saw in order to protect yourself from potential hazards.
Easy! Cut Thin Strips On Your Table Saw!
How to Cut Thin Strips of Wood by Hand
Cutting thin strips of wood by hand can be an easy and cost-effective way to complete many projects. To do so, you’ll need a sharp utility knife or other cutting implement, a straight edge such as a ruler or T-square, and some clamps to hold the wood in place while you work. Start by making sure the wood is held firmly against the straight edge before carefully tracing along it with your knife or cutting tool until desired length is achieved.
Be sure to make clean cuts for best results!
Cutting Thin Strips on a Table Saw Izzy
Cutting thin strips on a table saw can be tricky, but with the right technique it doesn’t have to be intimidating. Izzy is a great tool for cutting thin strips; this jig attaches to your existing table saw and allows you to make accurate cuts quickly and safely. With its adjustable width feature, you can easily cut different sizes of thin strips from 2mm up to 19mm in width.
Additionally, the integrated miter gauge allows for precise angle adjustments so that each strip is cut exactly as desired.
How to Cut Thin Strips of Wood Without a Table Saw
If you don’t have access to a table saw, there are still plenty of ways to cut thin strips of wood. A jigsaw is a great tool for cutting curves and thinner pieces. You can also use a circular saw with the appropriate blade attachment or even an old-fashioned handsaw if you have one available.
For maximum accuracy, use a straight edge guide and take your time when cutting to ensure straight lines and clean edges.
Tool for Cutting Thin Strips on Table Saw
Using a table saw can be tricky, especially when trying to cut thin strips. Fortunately, there is a tool that makes this task much simpler and safer: the miter gauge. The miter gauge attaches to the side of your saw and helps guide your material across the blade, allowing you to make accurate cuts with ease.
With practice, you’ll be able to use it for cutting thin strips in no time!
Conclusion
This blog post has provided a comprehensive overview of how to safely and effectively cut thin strips on a table saw. With the right blade, technique, and safety equipment, you can successfully make precise cuts on any woodworking project. By following these steps, you will be able to create beautiful pieces with accuracy and efficiency for years of enjoyment.
Table of Contents